Updated 2019 Edition
Presenting updated instructions for 120 Hz refresh rate on existing 1080p or 4K televisions or DLP projector, on this page’s sixth anniversary, 2013-2019!
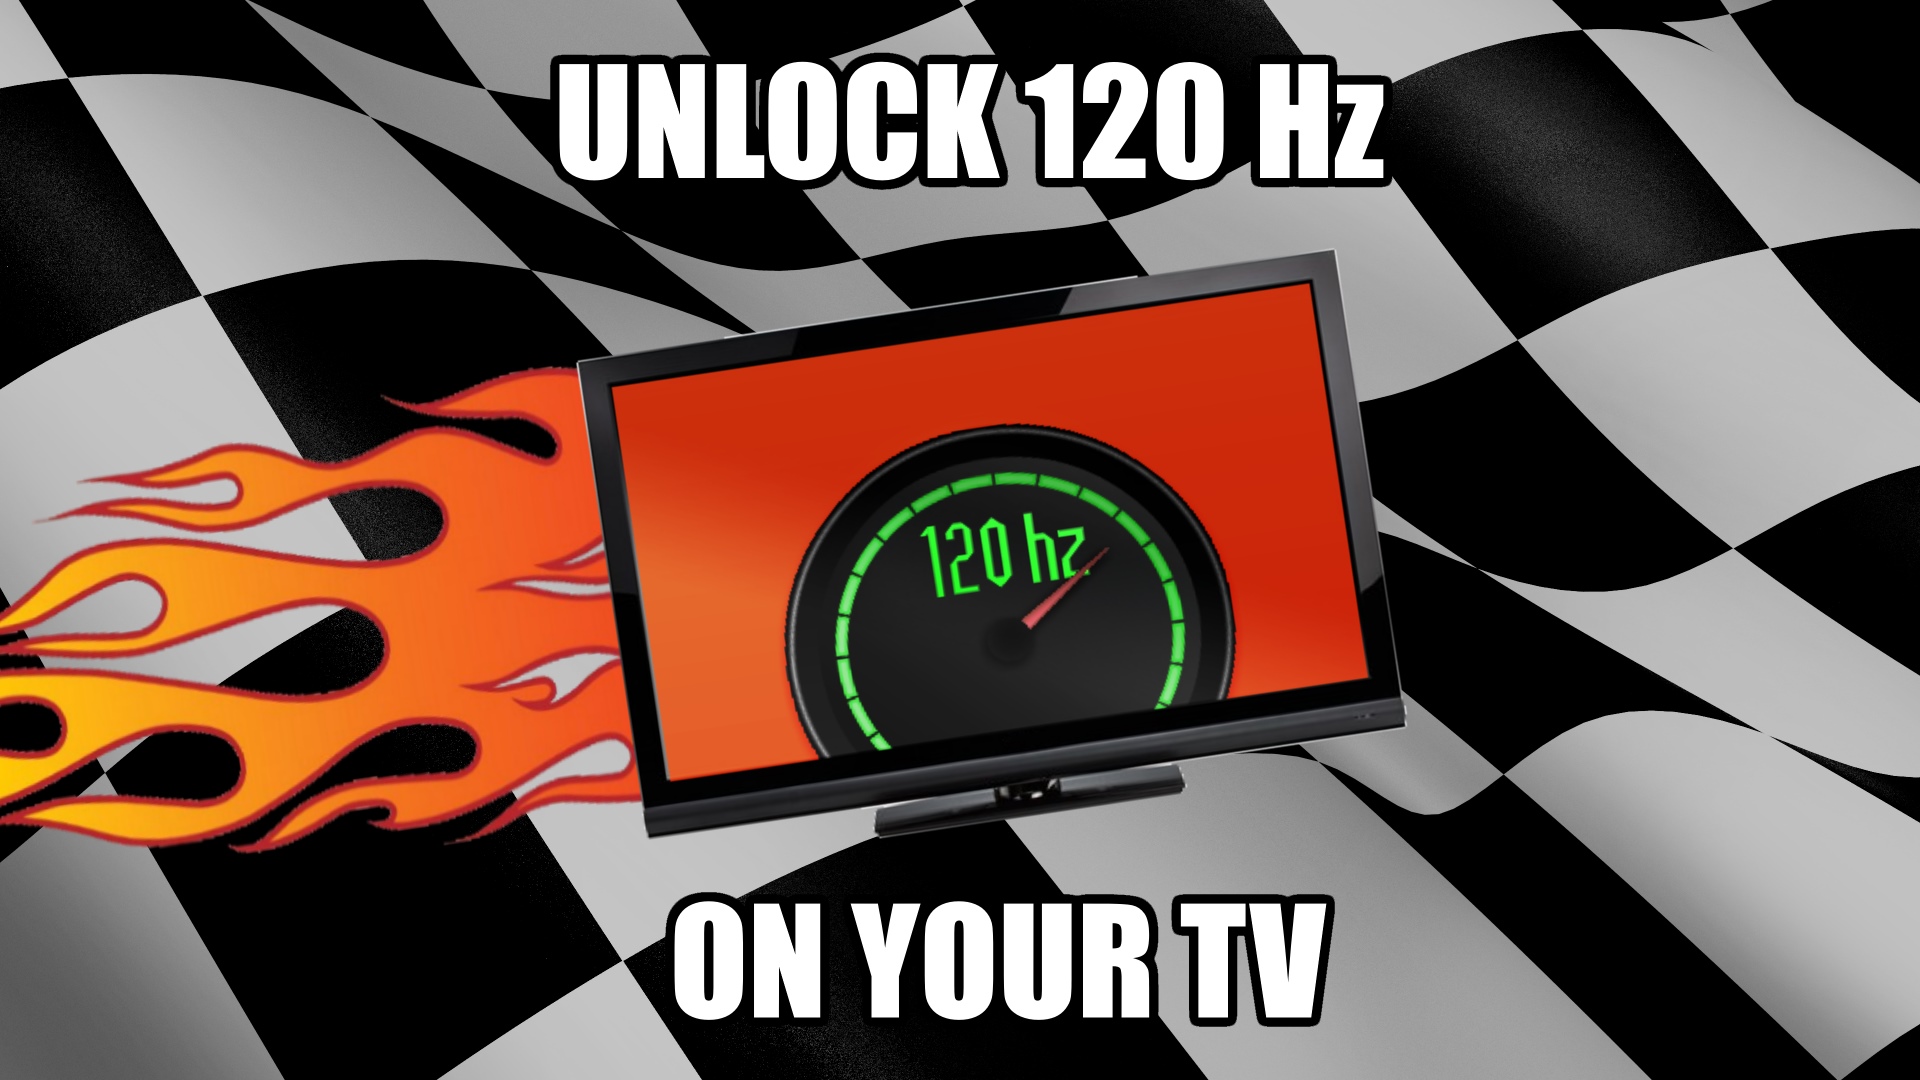
Unlock True 120 Hz Refresh Rate On Your Television!
Purpose: Use TV as a 120Hz computer monitor. Smoother motion and less input lag.
Supported Displays: Many HDTVs have hidden true 120Hz support. This includes Active 3D HDTV’s (the type that use electronic shutter glasses), as well as 4K Ultra HD televisions.
Alternatives: See List of 120Hz, 144Hz and 240Hz Monitors for computer monitors instead.
Many Televisions Unofficially Support True 120 Hz From A PC
Many TV’s do 120Hz internally for a different purpose (e.g. motion interpolation, active 3D). These TV’s support the dot clocks necessary for a true 120Hz refresh rate. Historically, this was called “refresh rate overclocking”. However, most newer HDTVs already support true native 120 Hz as an unadvertised feature.
Benefits of 120 Hz Instead of 60 Hz
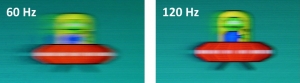
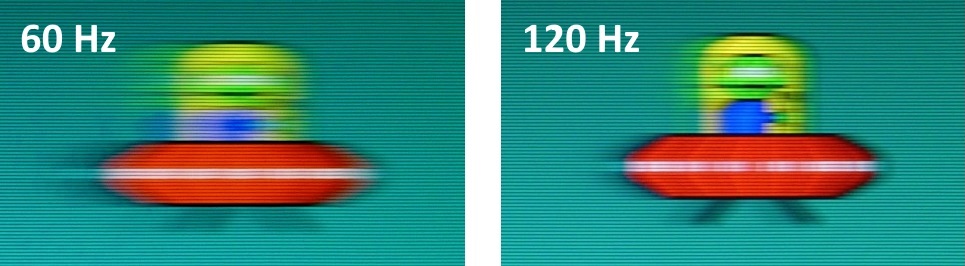
- 120 Hz has 50% less motion blur than 60 Hz, for text scrolling, panning, and video games.
- 120 Hz feels faster and has less input lag than 60 Hz in your computer games
- 120 Hz allows you to natively play HFR 120fps video on your computer.
EASY Instructions: When Your Television Has Automatic 120 Hz Support
- Try the easy instructions at Oh No, I’m At The Wrong Refresh Rate.
- If 120 Hz does not show up, try testing a lower resolution and see if 120 Hz shows up.
Try 1920×1080 on a 4K HDTV.
Try 1280×720 on a 1080p HDTV.
Try 1280×800 on a DLP projector. - If 120 Hz shows up and it works, you’re done!
Now test your new 120Hz at www.testufo.com
ADVANCED Instructions: Manually Force 120 Hz Output From PC To TV
If the EASY instructions above fails, you will have to instead force 120 Hz into your HDTV since the HDTV is not advertising its ability to support 120 Hz. Try one of the following Custom Refresh Rate methods:
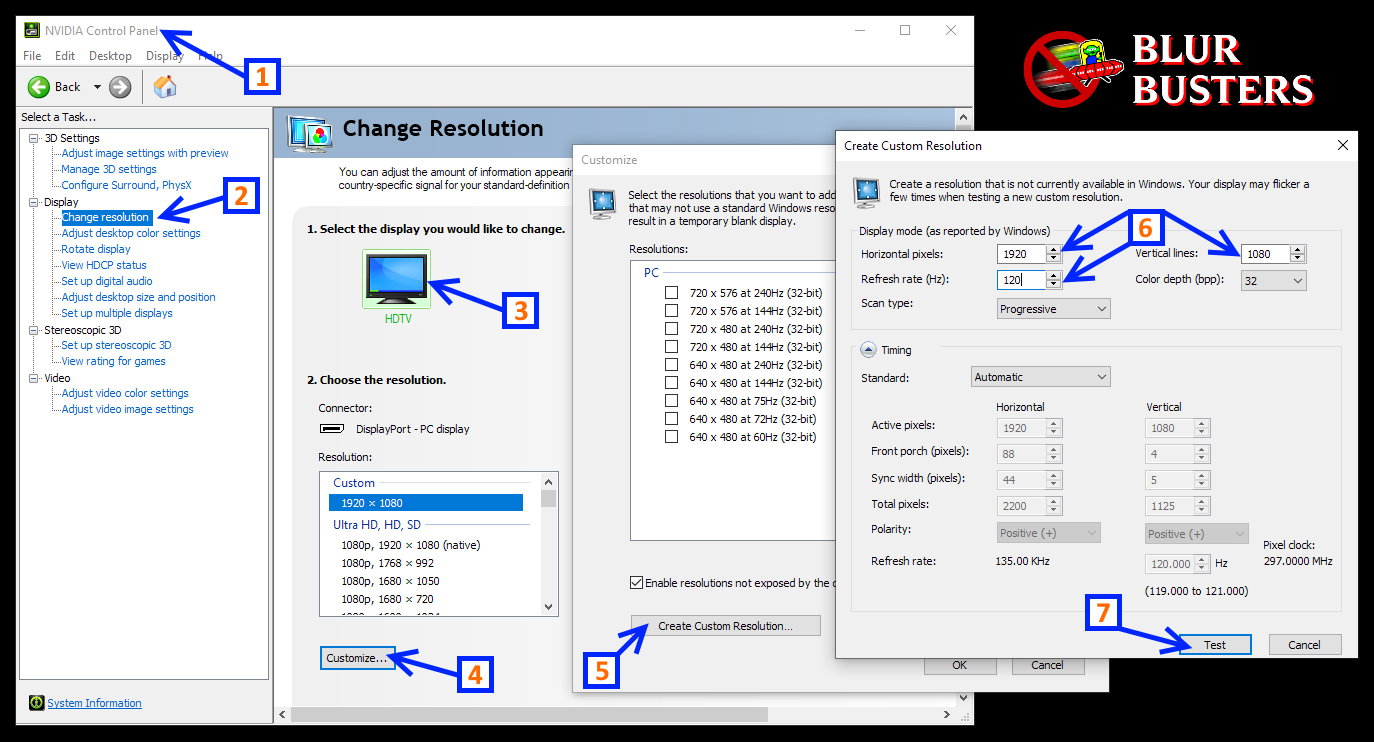
- Use NVIDIA Control Panel or AMD Catalyst Control Center if you have an AMD or NVIDIA GPU.
Right-click an empty area of your Windows desktop and launch. Then follow these steps:

If using the full resolution fails,
Try testing 1920×1080 on a 4K HDTV.
Try testing 1280×720 on a 1080p HDTV.
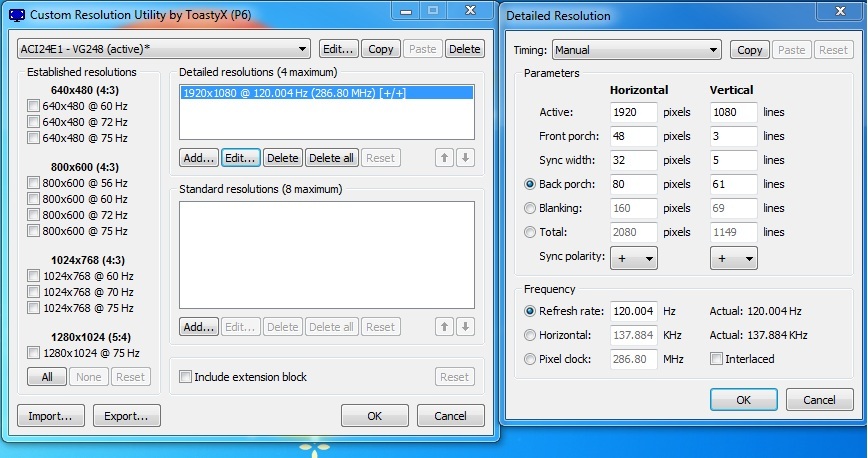
Try testing 1280×800 on a DLP projector. - Or Install ToastyX Custom Resolution Utility
This is a method that works on both GeForce and Radeon.
(For GeForce, NVIDIA’s Custom Resolution feature can also be used).

If using the full resolution fails,
Try testing 1920×1080 on a 4K HDTV.
Try testing 1280×720 on a 1080p HDTV.
Try testing 1280×800 on a DLP projector. - Or Expert Hacker Method:
Install a Manual EDID override. This is the hardest method, recommended only for advanced users. If you need to get familiar with how EDID overrides are installed, see 3D Vision Blog Instructions (different purpose), and Microsoft technical info.
DISCLAIMER: Follow these instructions at own risk. Blur Busters disclaims all responsibility for any possible damage or disruptions. Historically, nobody has ever reported television damage from doing this. However, please follow the Tips below for software recovery instructions if you accidentally misconfigure your computer.
Important Tips
- Try the EASY Instructions First.
Do the ADVANCED Instructions only if the EASY instructions don’t work. - If Using Multiple Displays, Make Your HDTV the Primary Monitor for Reliable 120 Hz
If you are connecting multiple screens to a computer or laptop.

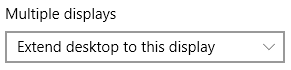
- If Using Multiple Displays, Choose “Extend Desktop To This Display”
When using multi-monitor, 120 Hz is easier when not duplicating or mirroring.

- If Full Resolution Fails, Try Testing 120 Hz At Lower Resolutions
Try testing 1920×1080 on a 4K HDTV.
Try testing 1280×720 on a 1080p HDTV.
Try testing 1280×800 on a DLP projector. - Test Other GPU Outputs
Only some of the GPU outputs may support 120 Hz. - Test Other Television Inputs
Only some of the television inputs may support 120 Hz. - Test Other Cables or Adaptors
If you have a very old HDMI cable (over 10 years old), try a newer HDMI cable.
If you have a single-link DVI cable or DVI-to-HDMI adaptor, you can only do 120 Hz at 1280×720.
You need dual-link DVI cable in order to do 120 Hz at 1920×1080 over DVI. - ADVANCED: Test ToastyX Reduced Blanking Interval in a Custom Resolution Utility
Some older televisions only “almost” reaches 120Hz, but not quite. For example, 115 Hz or 118 Hz. To fix such a minor shortfall, reduce the timings (smaller numbers for Front Porch, Back Porch and Sync) to maintain same dotclock while raising refresh rate. Using “Reduced” instead of “Automatic” within ToastyX Custom Resolution Utility, can do this too. This may allow success at 120Hz - ADVANCED: Uninstalling ToastyX CRU To Fix Everything
If you have problems with ToastyX Custom Resolution Utility, just run “reset-all.exe” to undo the changes made by the ToastyX Custom Resolution Utility. - ADVANCED: Fix In Safe Boot Mode
Your screen may go blank, black, and/or display distorted graphics until you reset back to 60 Hz. Normally, the refresh rate test should automatically switch back to 60 Hz if you are unable to successfully confirm 120 Hz. In the event you accidentally get stuck in an unviewable resolution or refresh rate, you can reboot into Safe Mode via pressing F8 while turning on your computer. From there, you can switch back to 60 Hz via Control Panel.
Verify That Your Television Is Correctly Display 120 Hz
- View The Motion Test at www.testufo.com
The 120 fps UFO should have approximately half the motion blur of the 60 fps UFO. - Do A Frame Skipping Test
If the 120fps and 60fps UFOs look identical, run the TestUFO: Frame Skipping Check.
If your television is skipping refresh cycles, try a lower resolution such as 720p instead of 1080p.
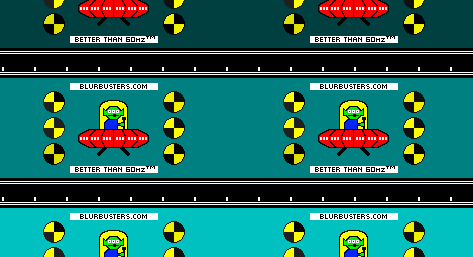
No fake frames. No interpolation tricks. No Motionflow voodoo. True 120Hz!
If you have a success report in doing 120 Hz HDTV refresh rate, please feel free to post your TV model in the Blur Busters Forums!
